Making soap has been on my list for a while but I never actually thought I’d get a chance to make it. I knew it had to be complicated, but I knew nothing besides that soap used to be made with animal fat back in the day.
Once I started researching homemade soaps my eyes were opened to a whole new world! They are gorgeous! I wasn’t sure where to start until Anne-Marie from Brambleberry introduced me to the Natural Soap Kit for Beginners. It has all the supplies and instructions to start your own homemade soap. Talk about awesome!
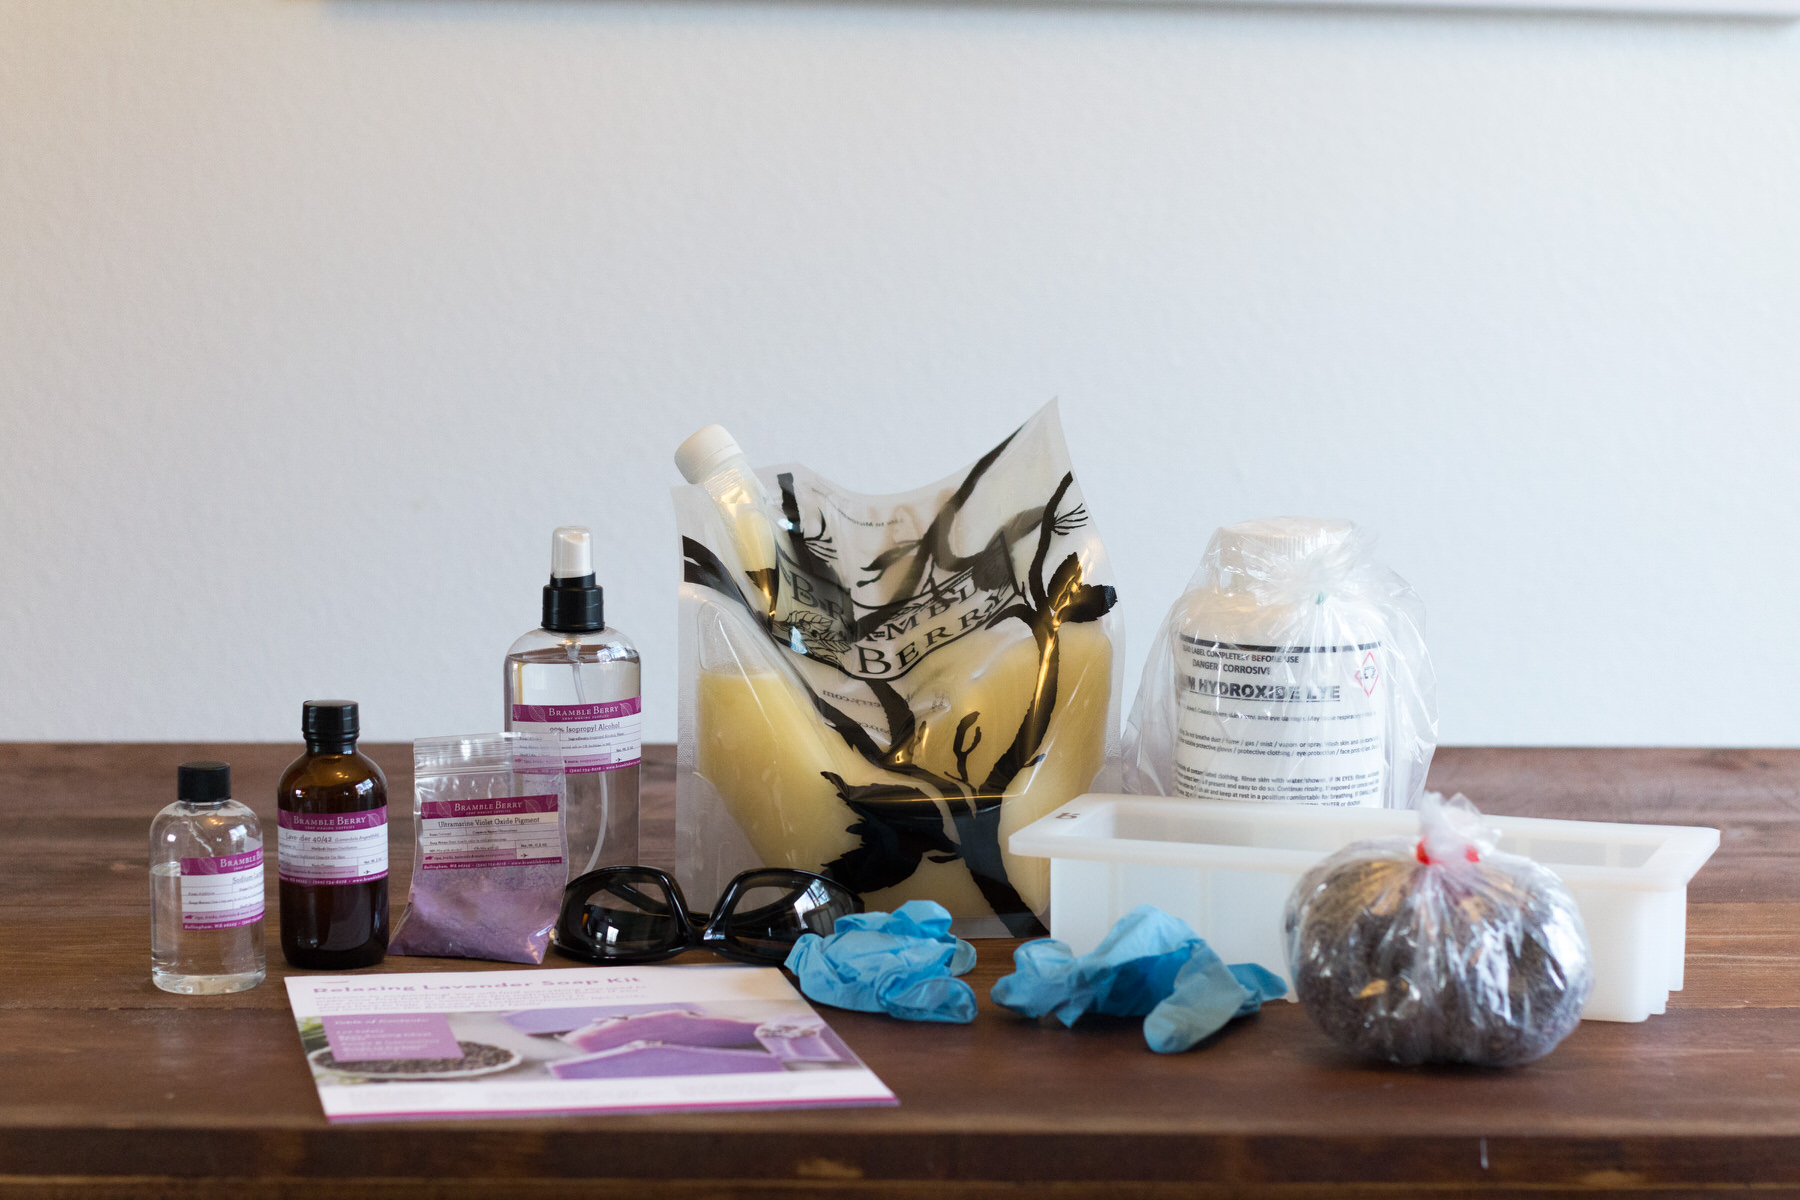
Supplies provided in the kit:
- Reusable Silicone Mold
- Lather Quick Mix Pre-blended oils
- Digital Scale
- Goggles & Disposable Gloves
- Sodium Hydroxide
- Sodium Lactate (soap hardener)
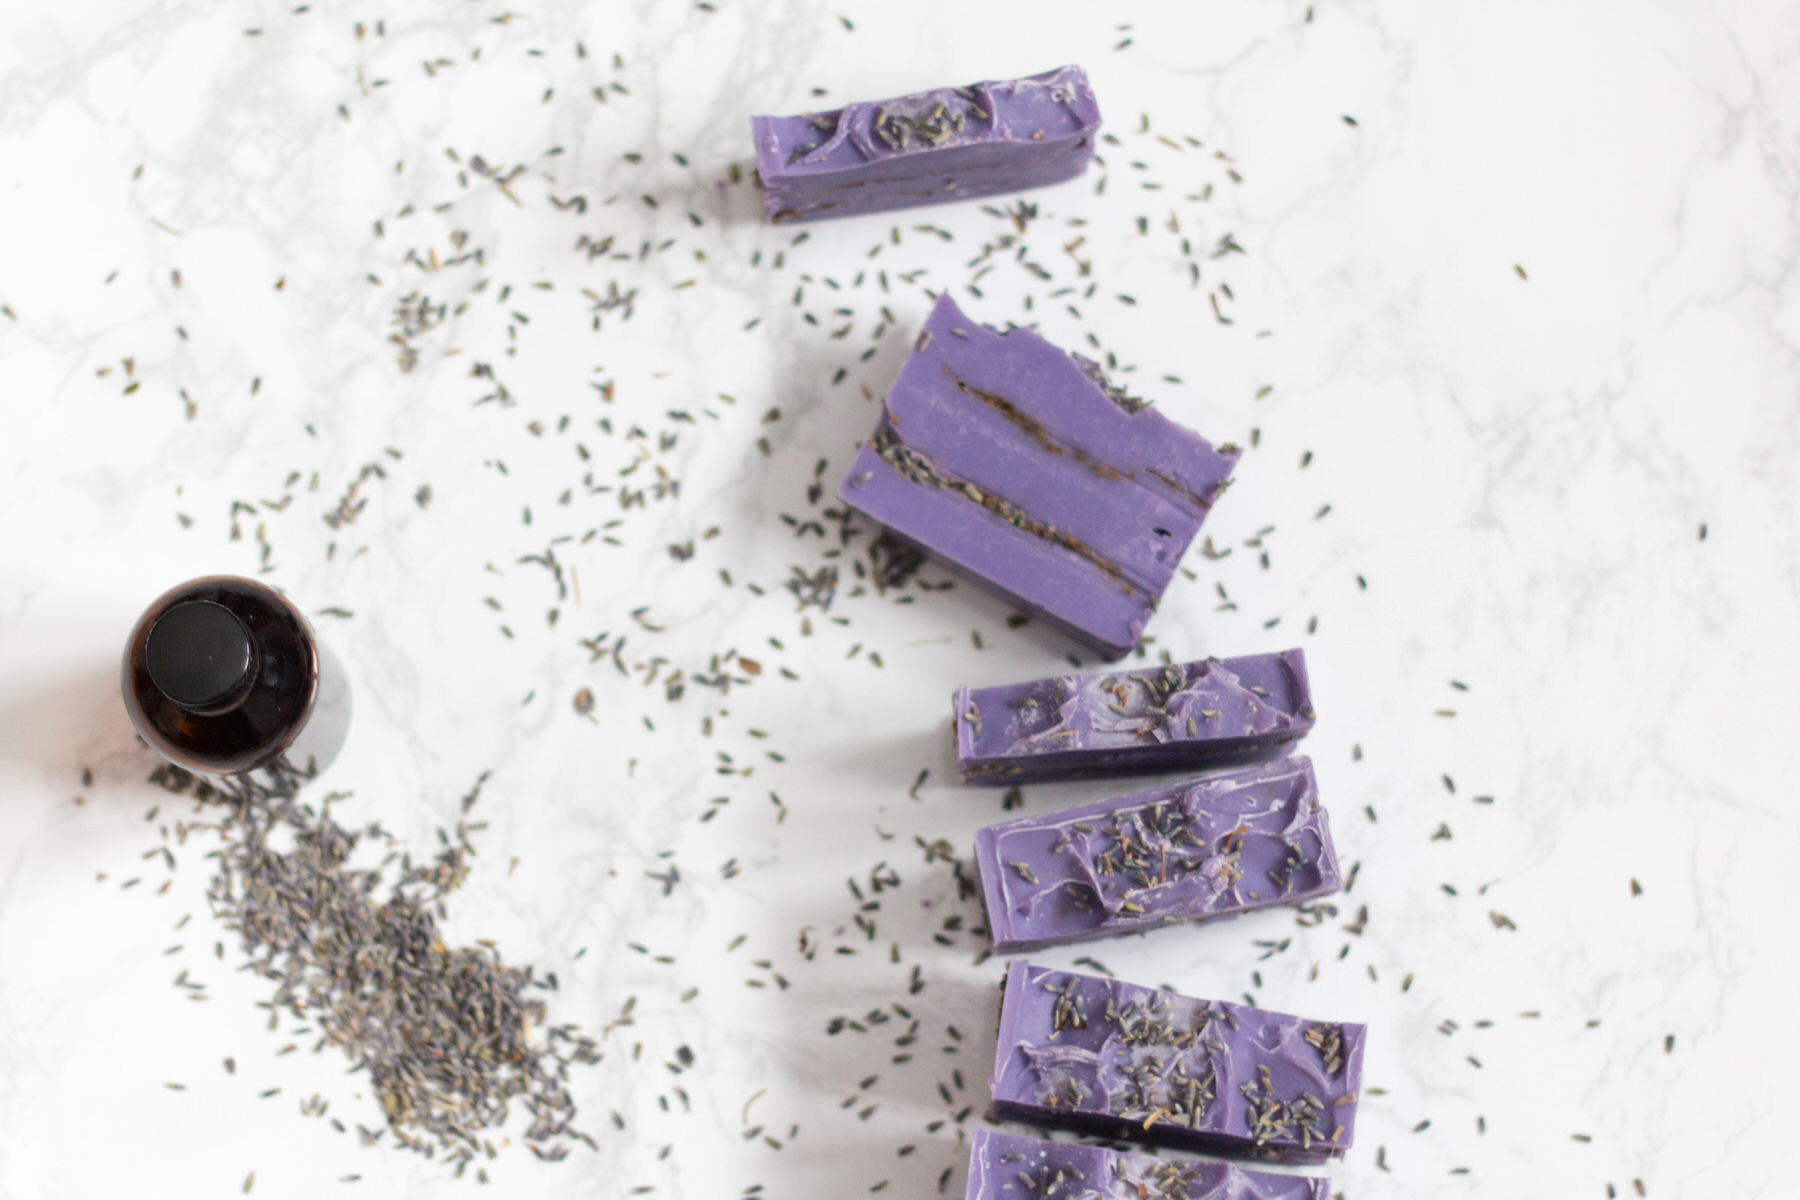
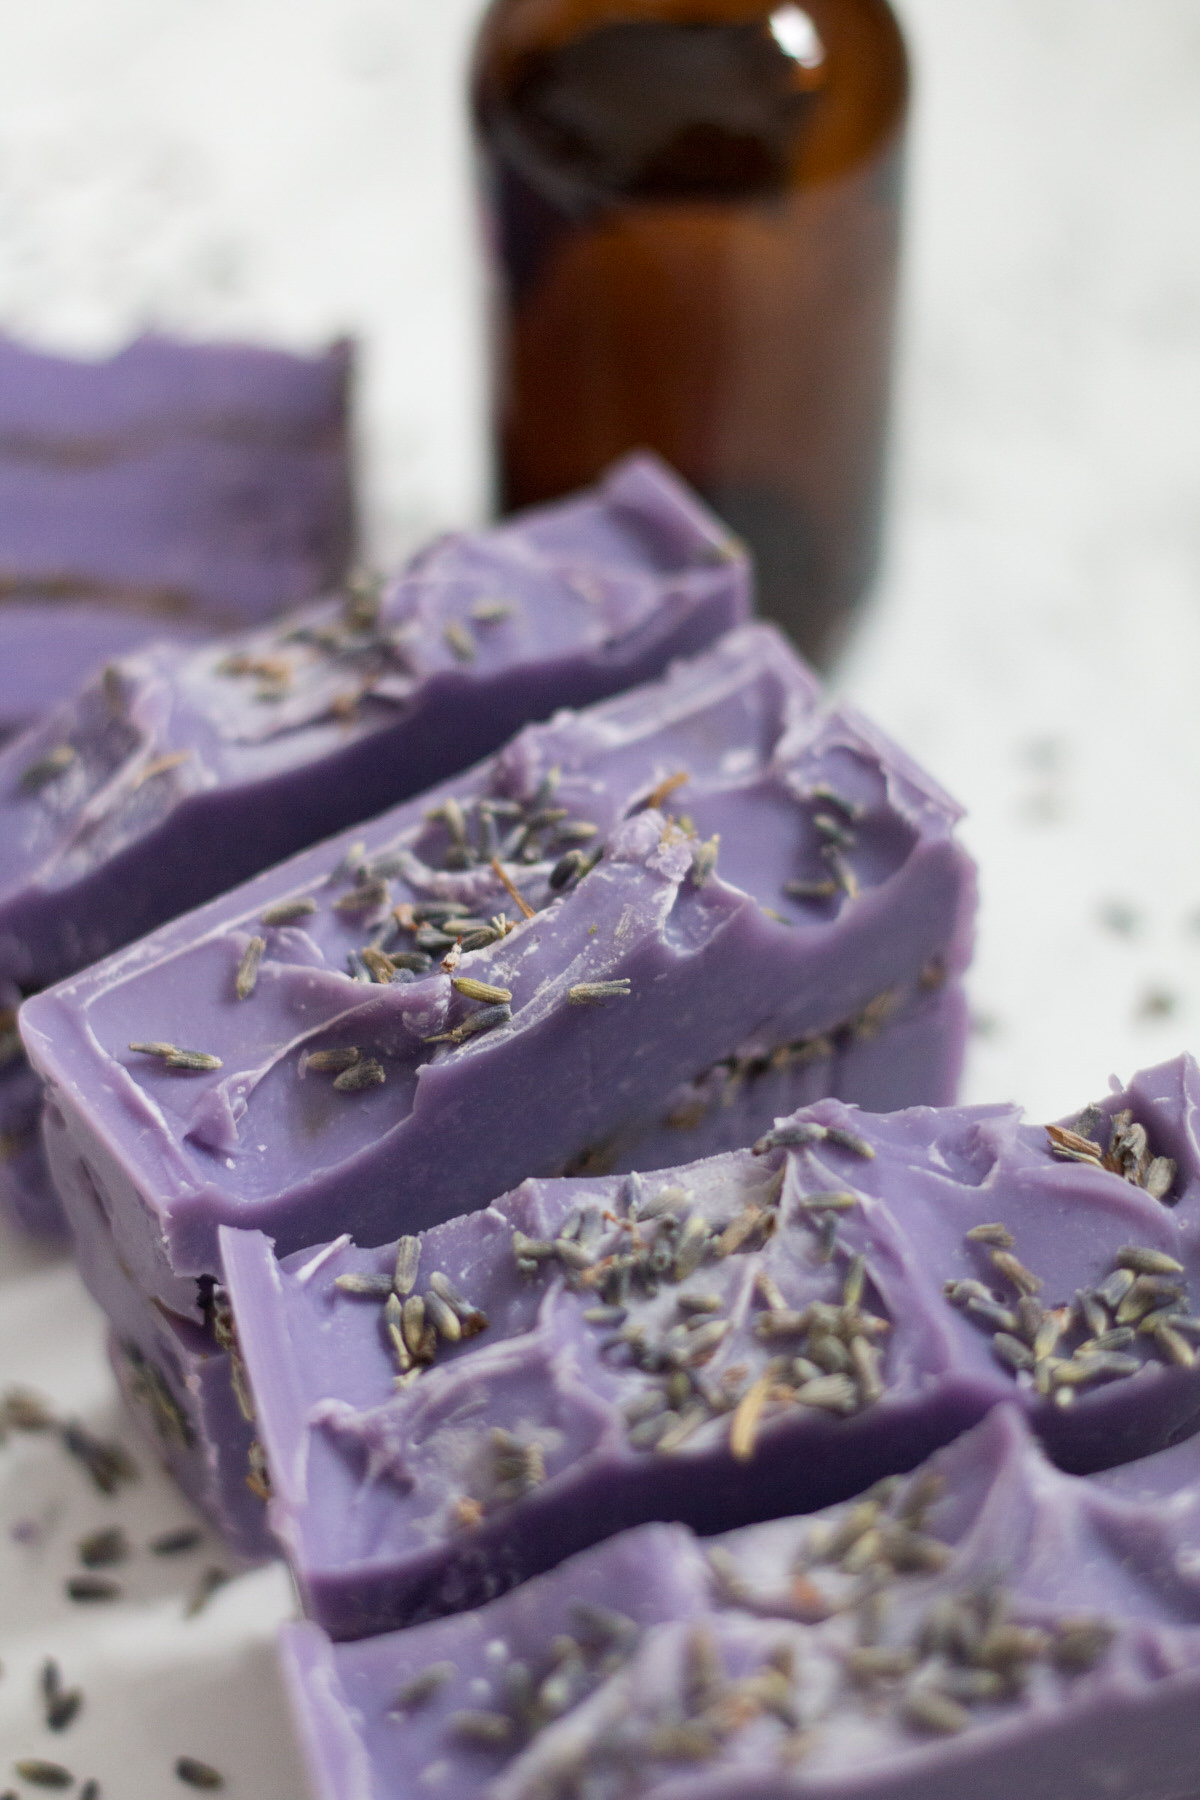
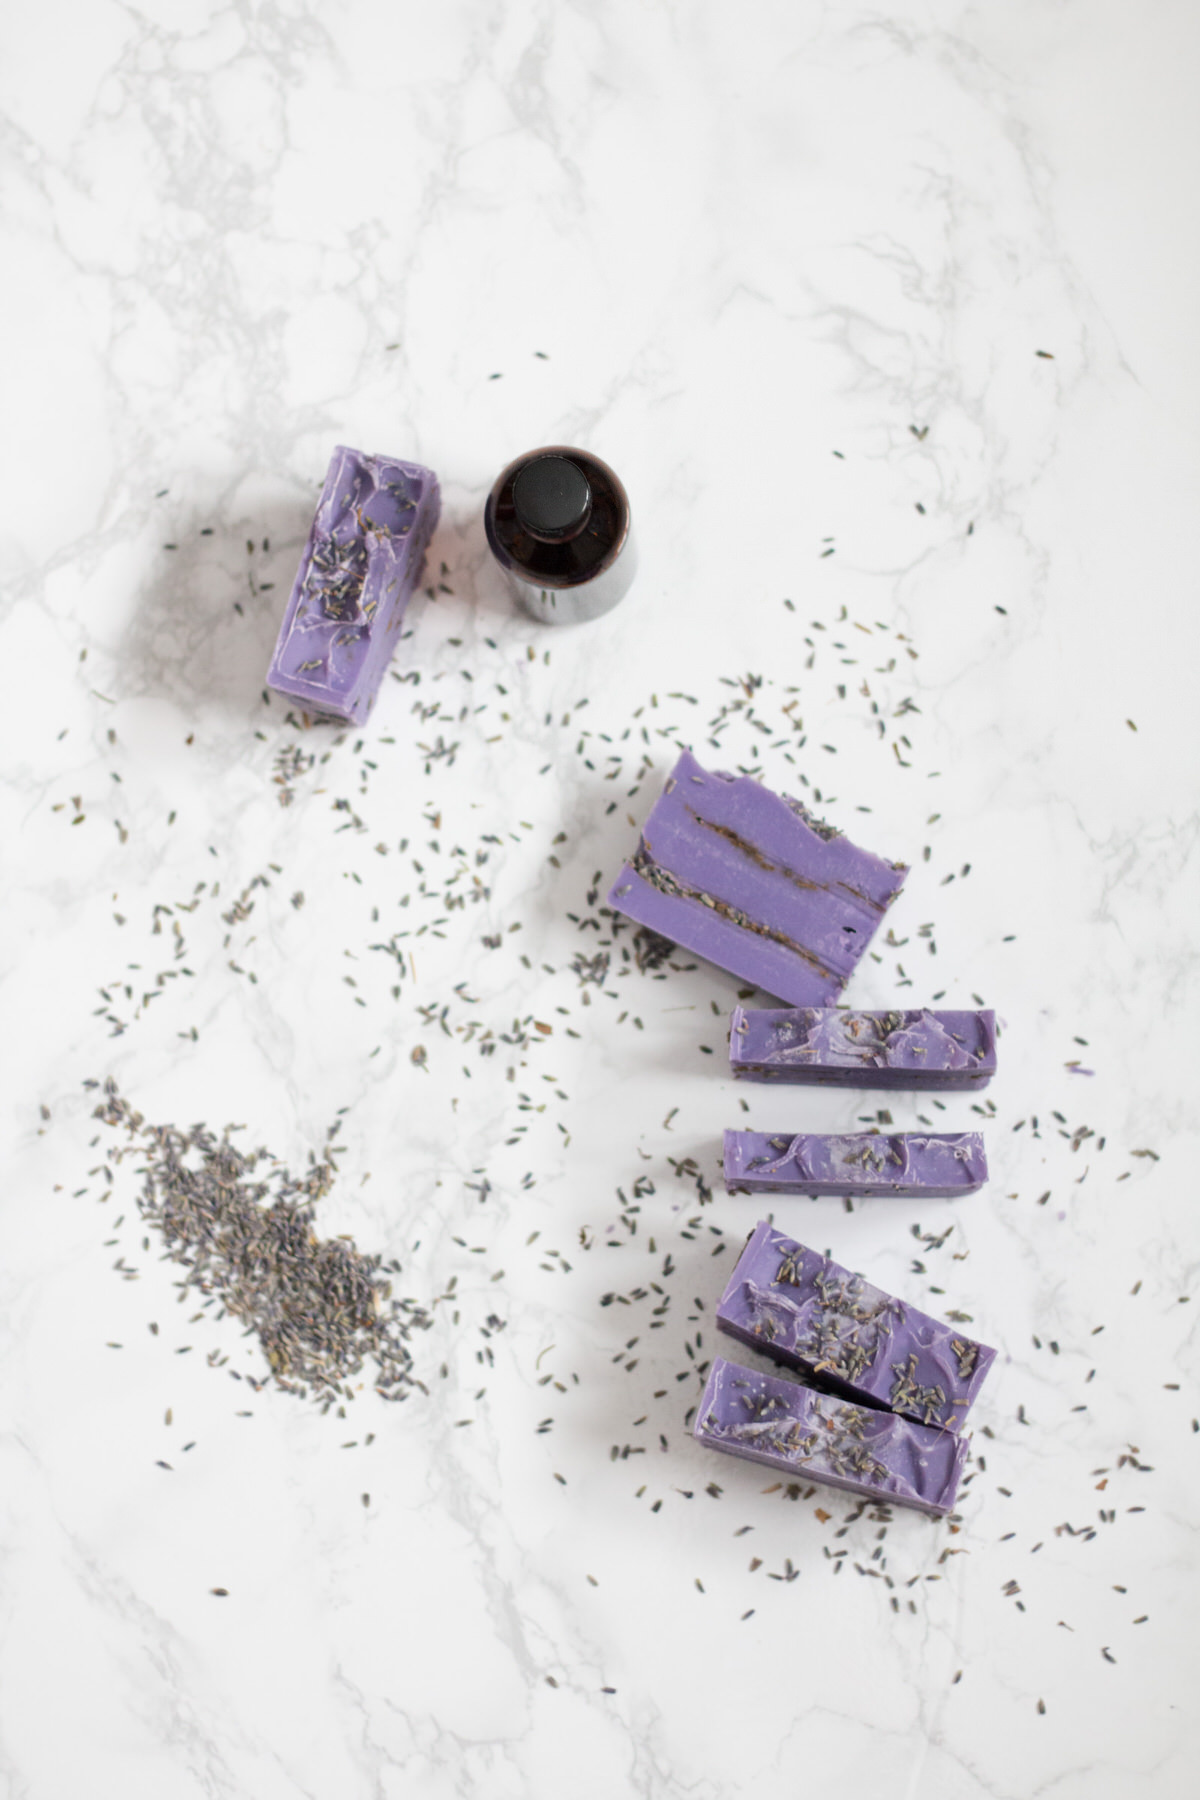
- Lavender Essential Oil
- Violet Oxide (colorant)
- Lavender Buds (soap topper)
- Rubbing Alcohol in Spray Bottle (soap finisher)
Pretty much all of these ‘ingredients’ were foreign to me. But they are all explained well in the booklet you get. All you need to provide yourself is distilled water, a stick blender (or some type of blender), thermometer, a bowl, and stirring utensil.
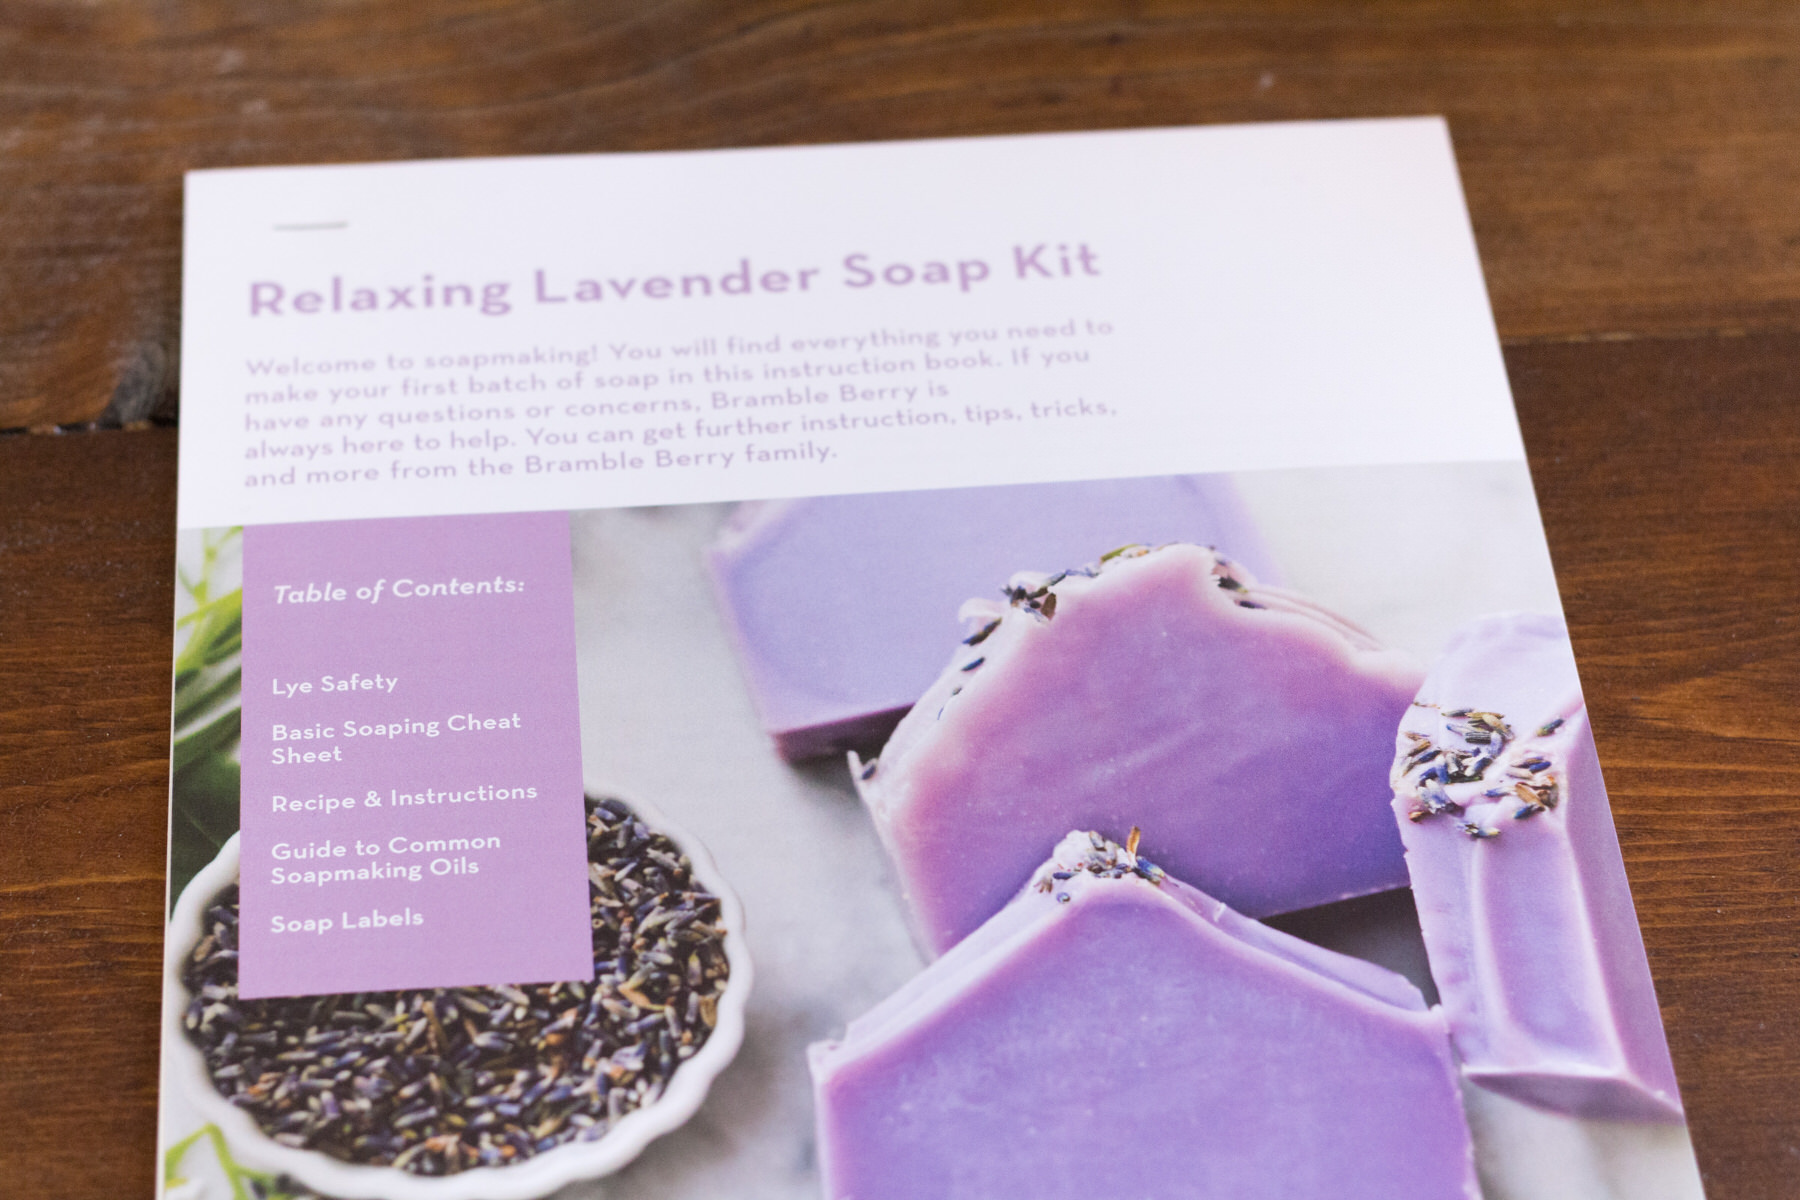
The instructions gave a lot of information and you just walk through each step. There were a few safety videos that I watched carefully since Sodium Hydroxide is pretty hazardous and I was worried about inhaling it. But now that I’ve done it once, I feel much more confident making a second batch!
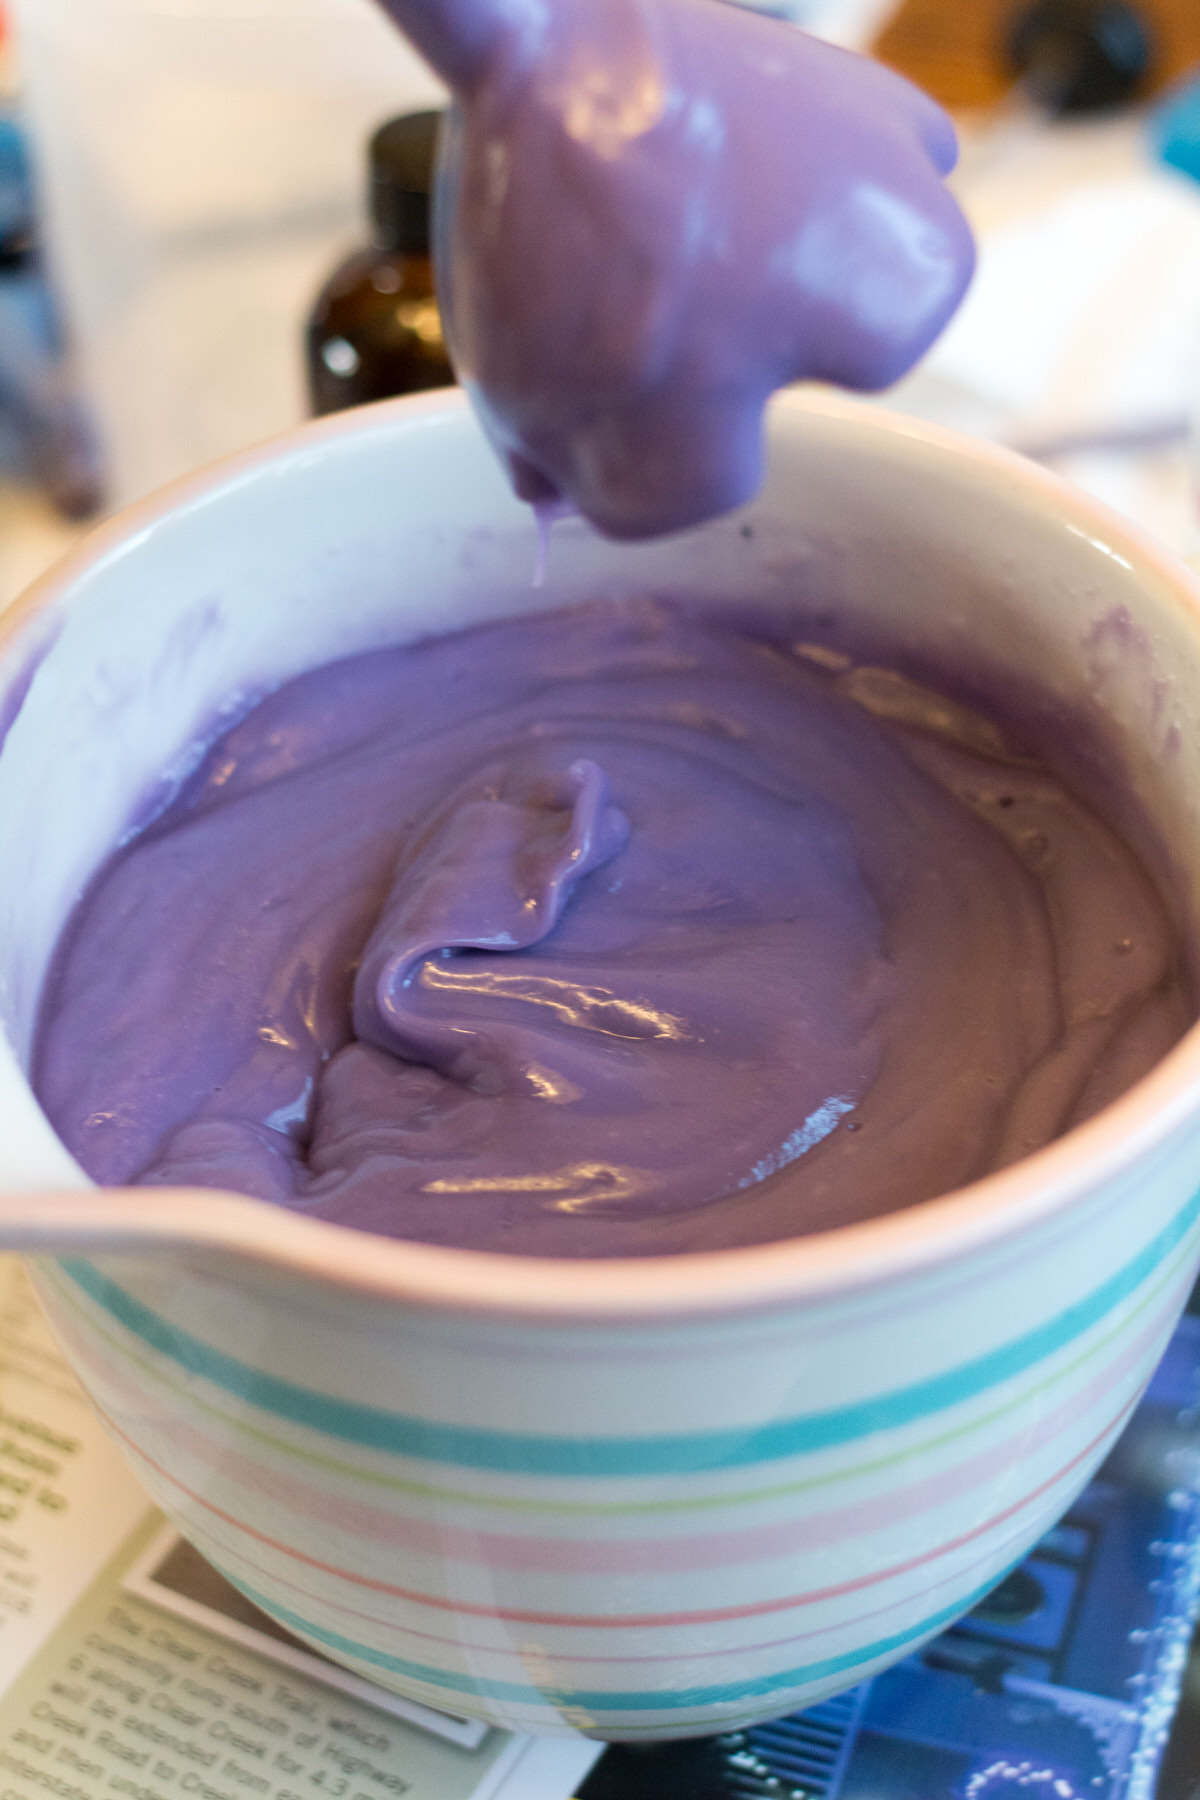
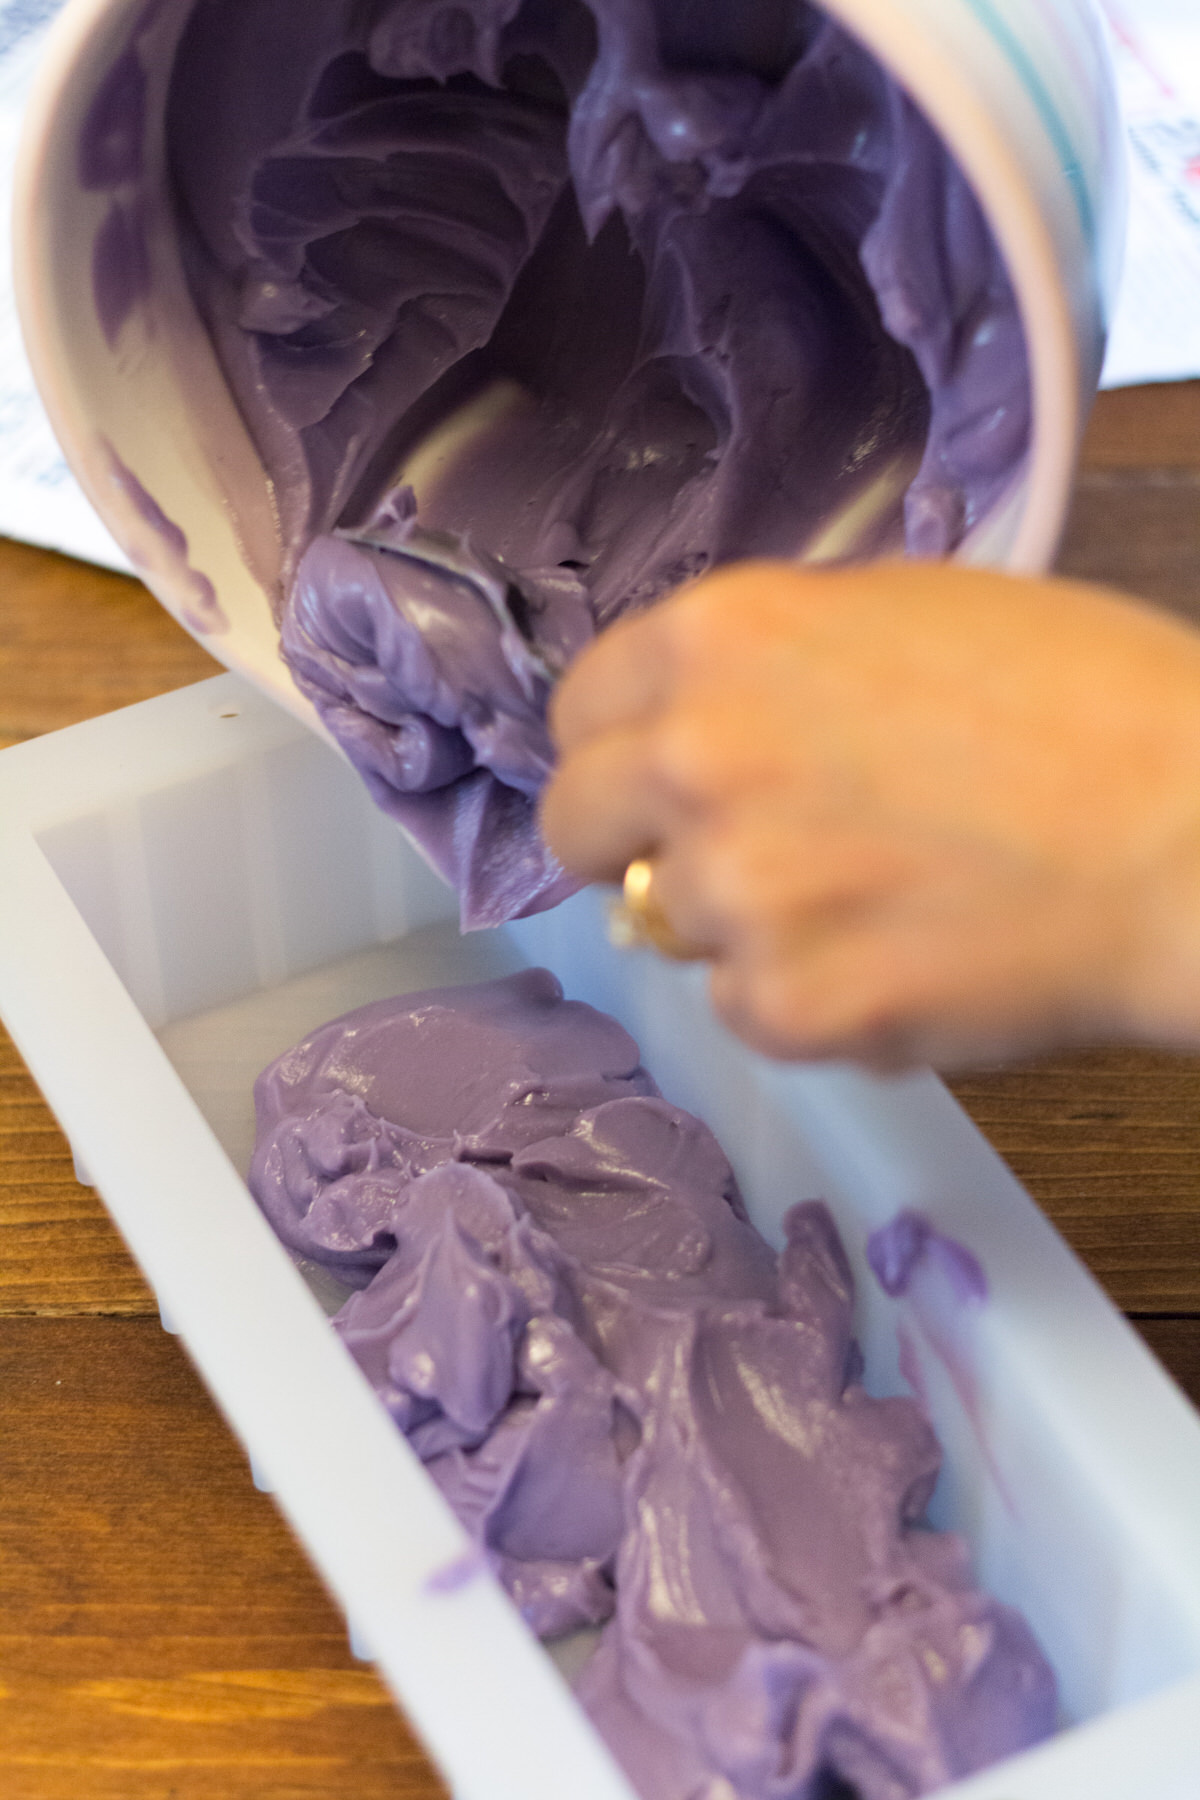
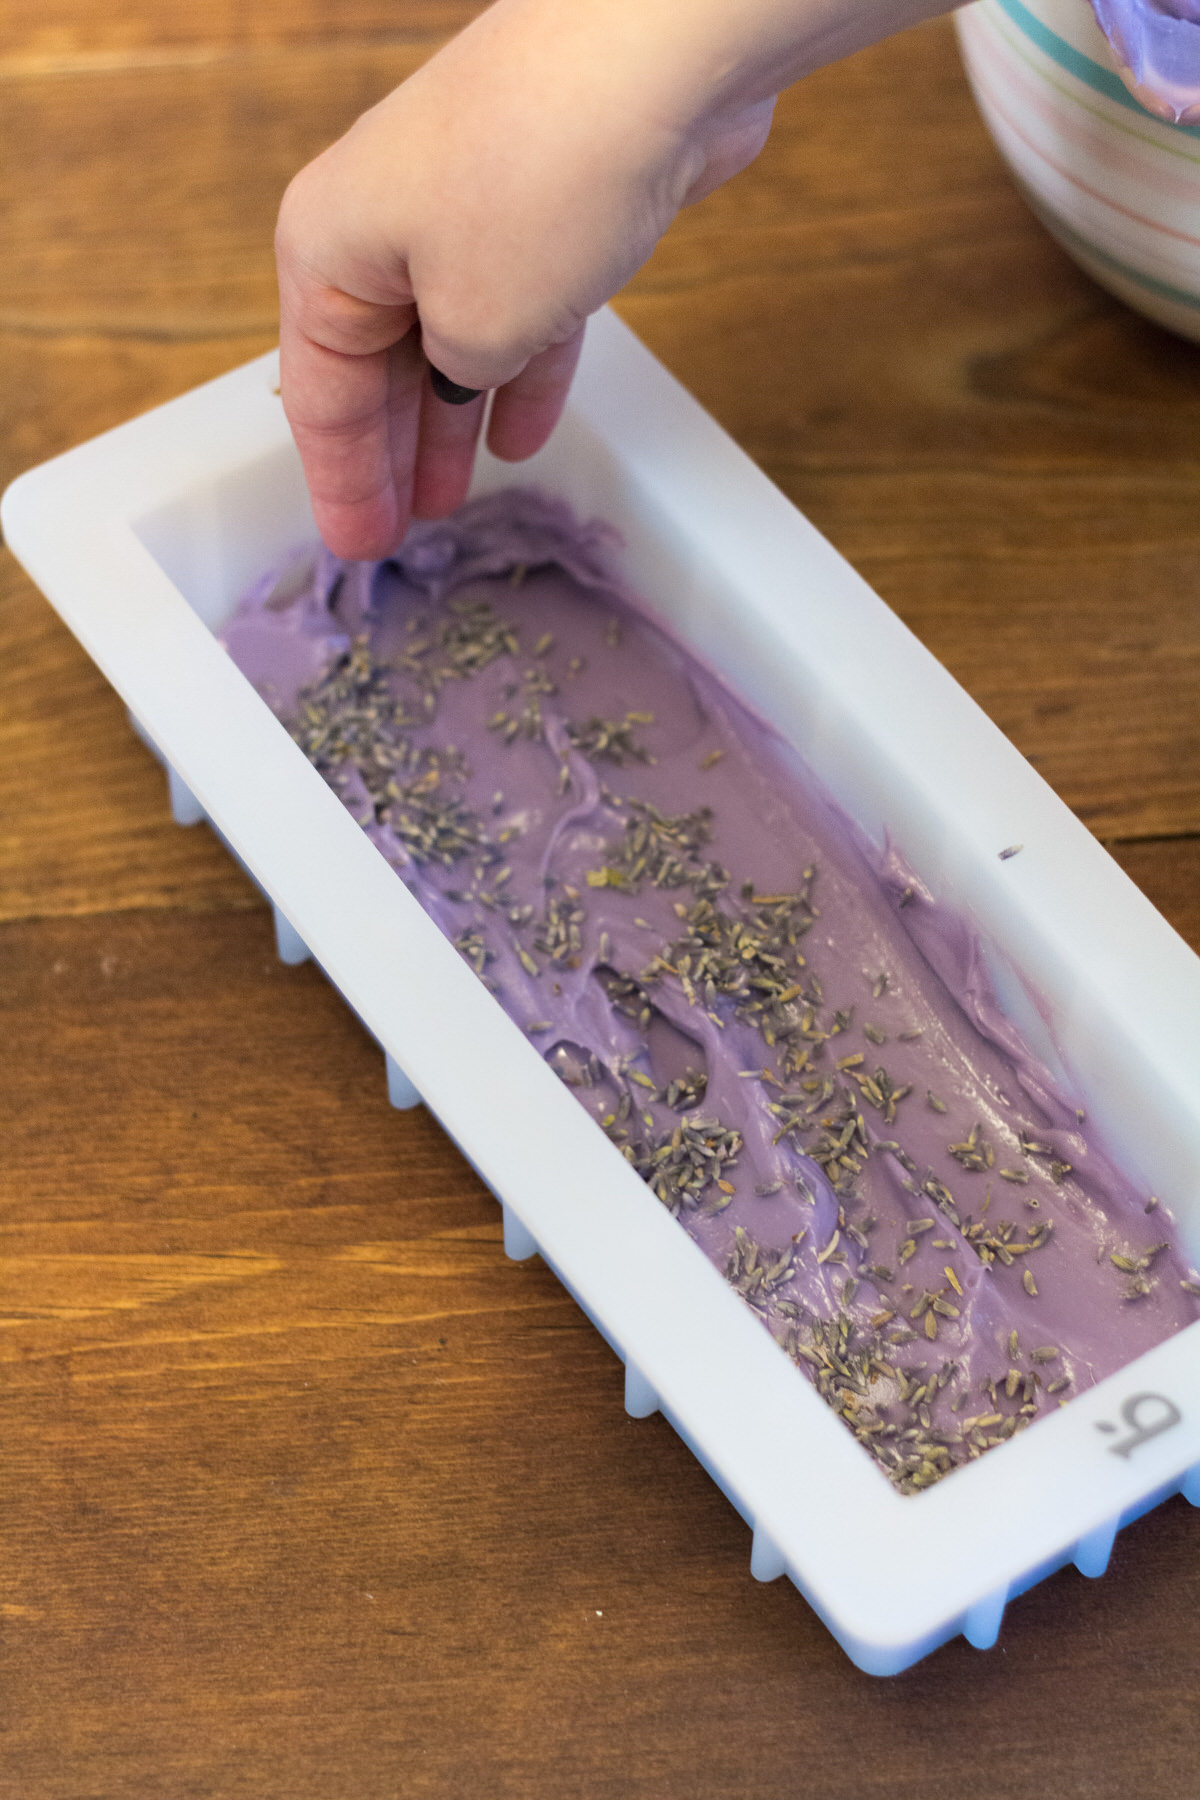
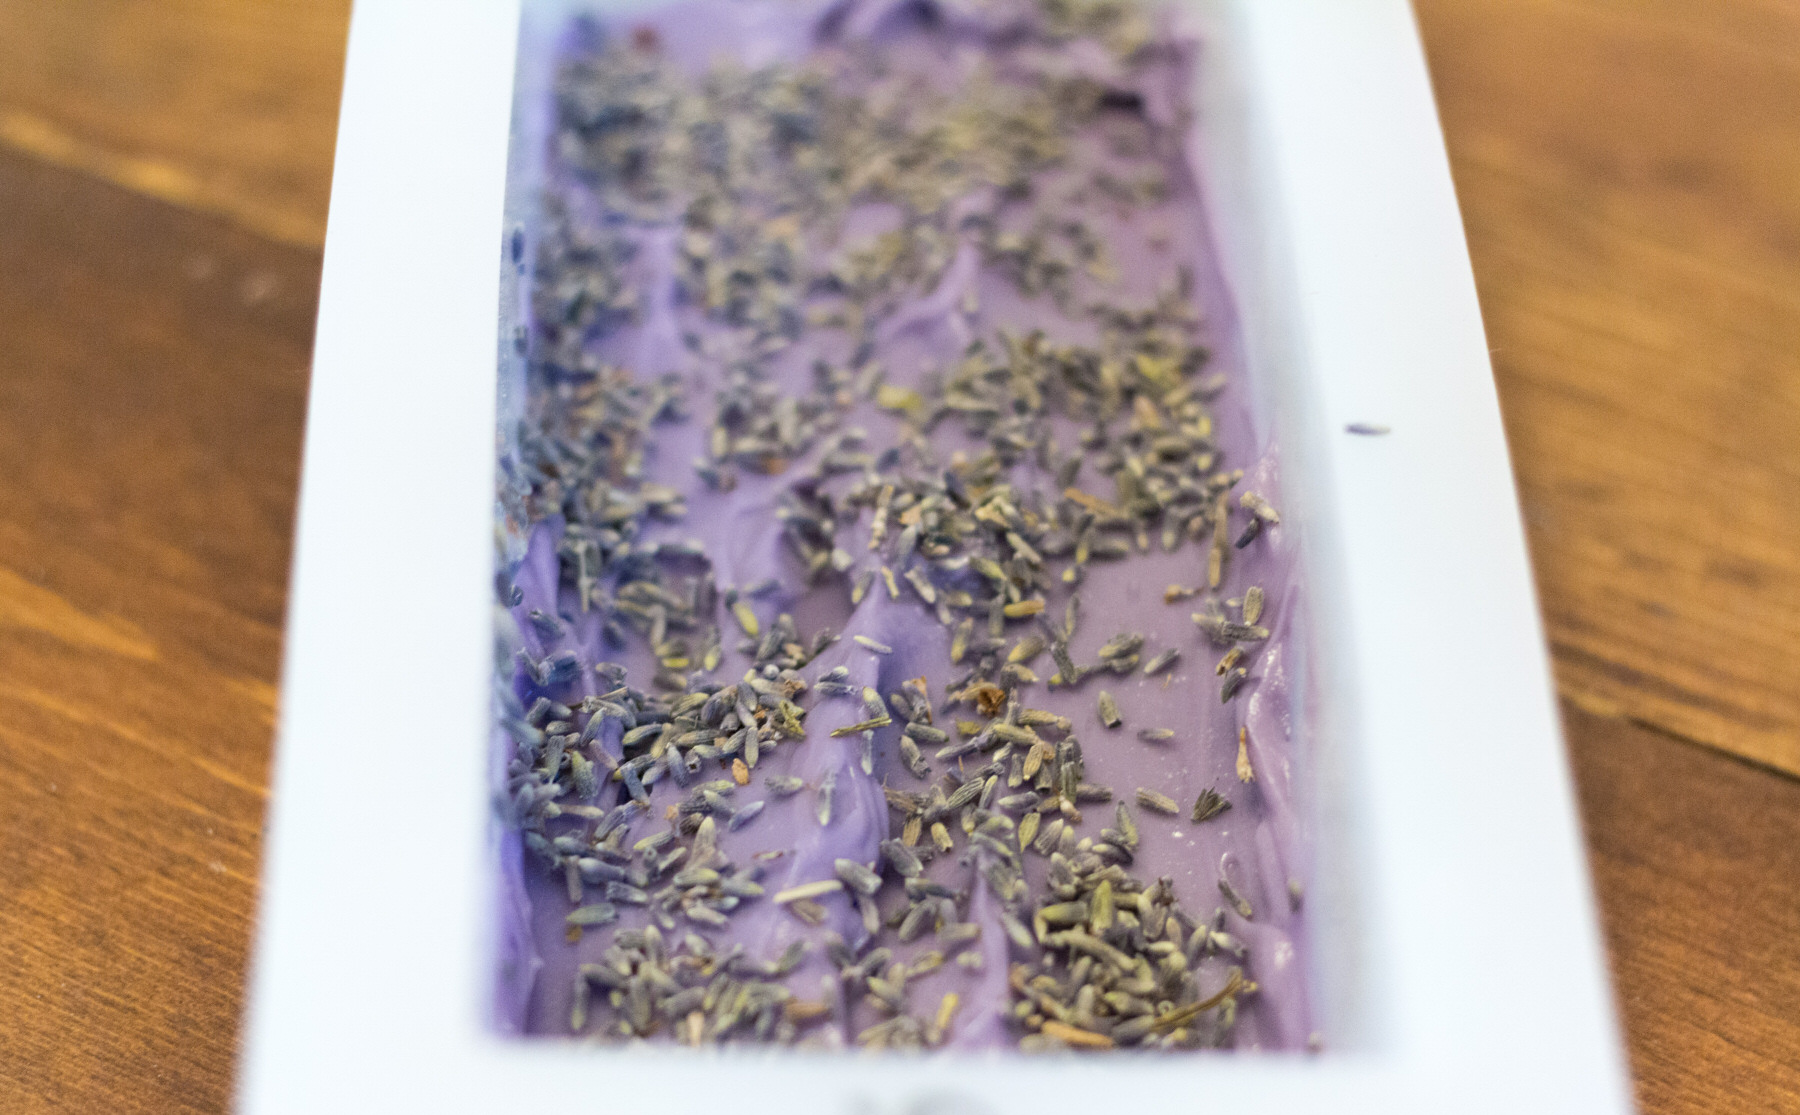
First, you mix the Sodium Hydroxide in warm water making sure to wear gloves and goggles and avoid inhaling the fumes. It is amazing how warm it gets! I used an old glass measuring pitcher for this since we’ve had it since our wedding and I’ve probably used it twice. Once it reaches a certain temperature (somewhere around 180º I believe!), you let it sit and then will pour with the warmed up pre-blended oils. Add the essential oils and the colorant and then just pour into the mold. I think the whole process was about 20 minutes! I’m sure I missed a few steps but that’s the gist of it. Way quicker than I realized and super easy once you understand the lye safety.
I purchased a Koios hand blender when it was on sale as soon as I knew the kit was on its way. I was a little worried about using something I would also use with food but I think after a good scrub and soak it should be just fine. Plus this hand blender came with a bunch of attachments and I wouldn’t really use this attachment for anything else right now.
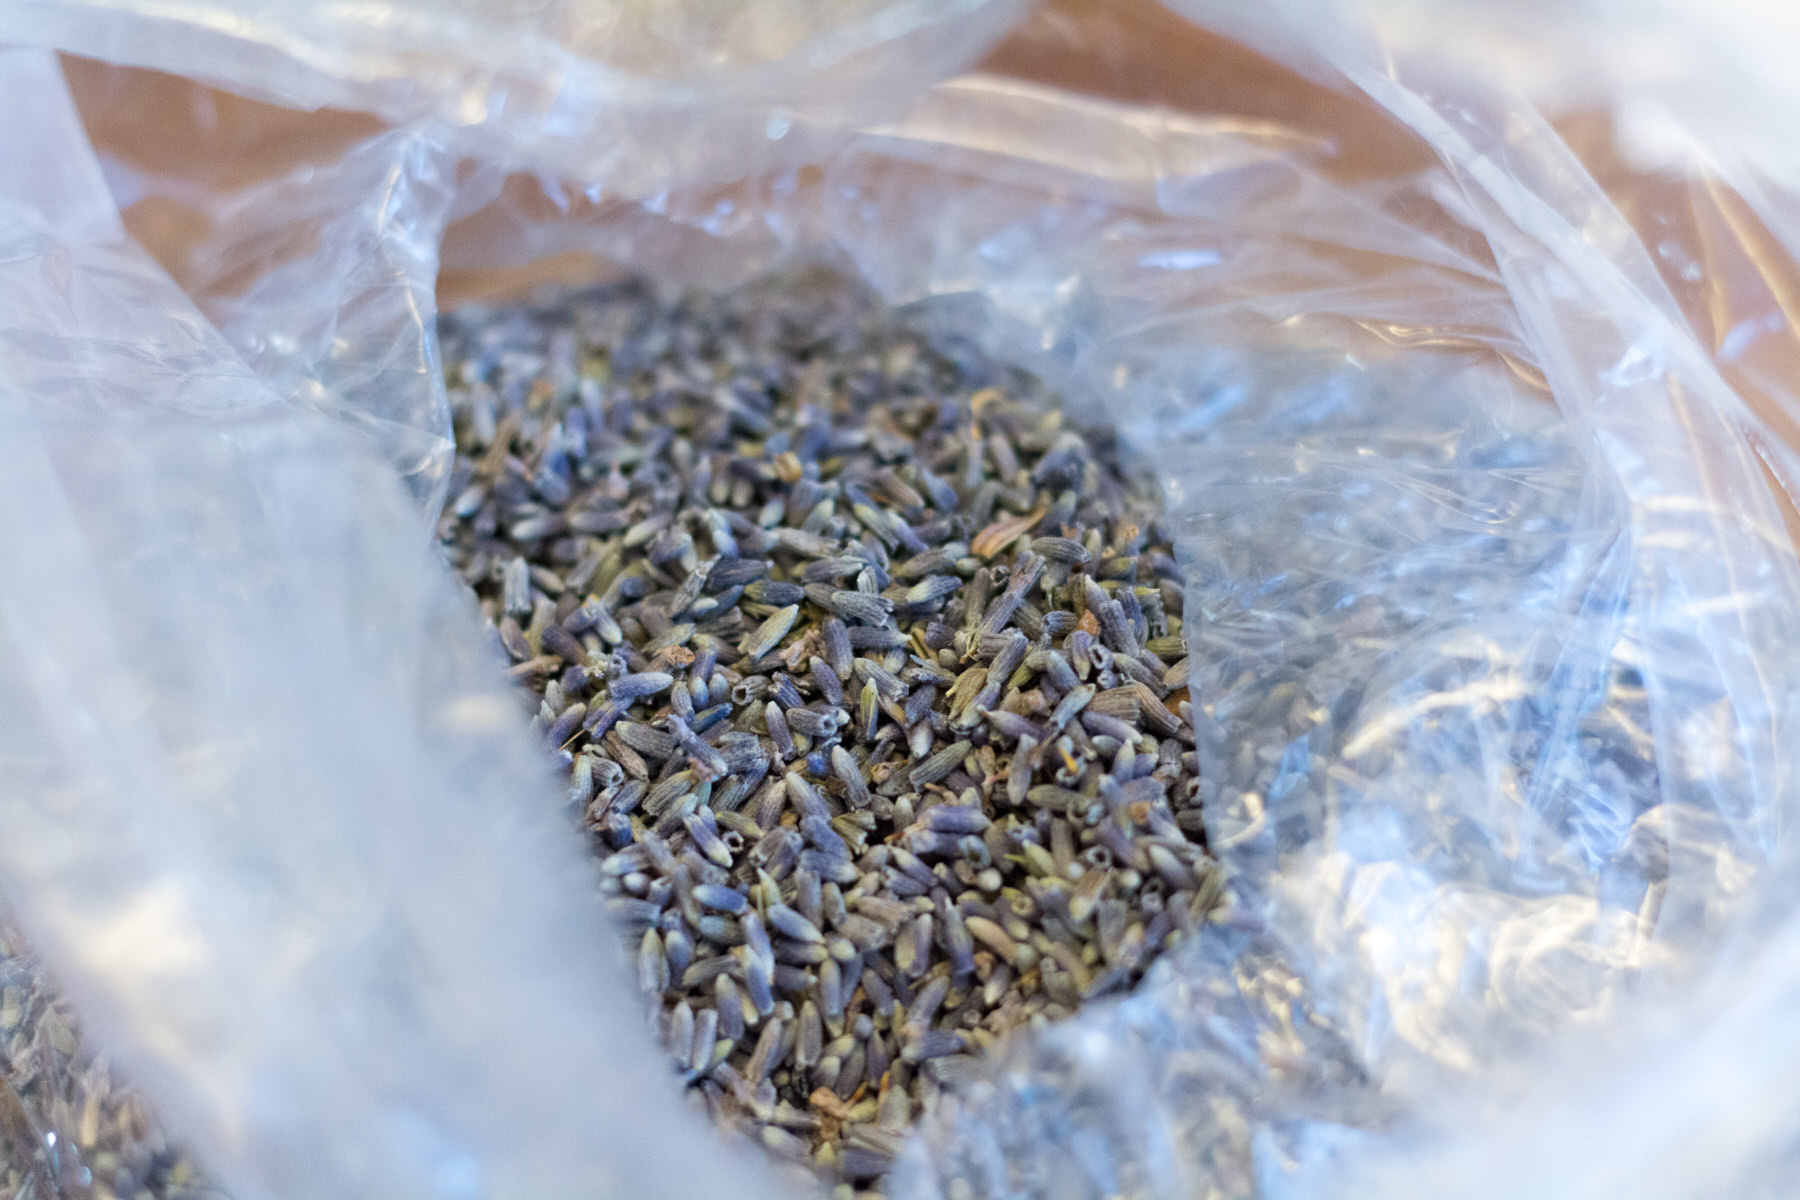
I have a good amount of lavender buds left, any ideas how I can use them up?!
I think I mixed a little too long because my batch had already started to harden before I could get it into the mold. I also was trying to get photos. With the help of a couple friends to help pour and double check the steps, it made it much easier to do. It’s a great kit to do with friends since it makes a solid amount of soap! It is also a great personal gift to give to friends and family!
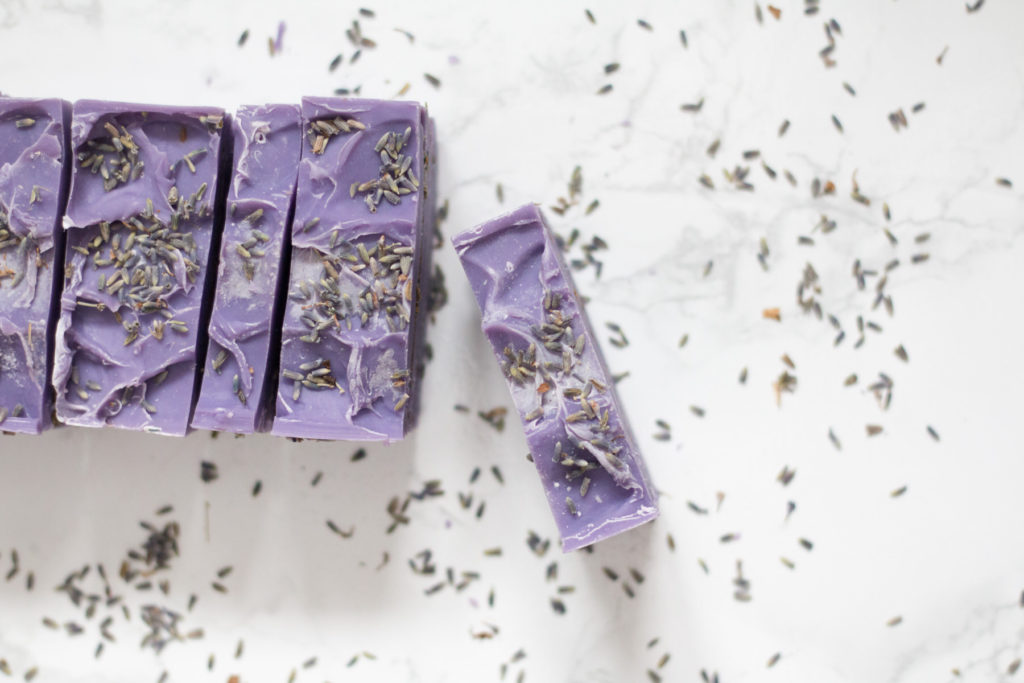
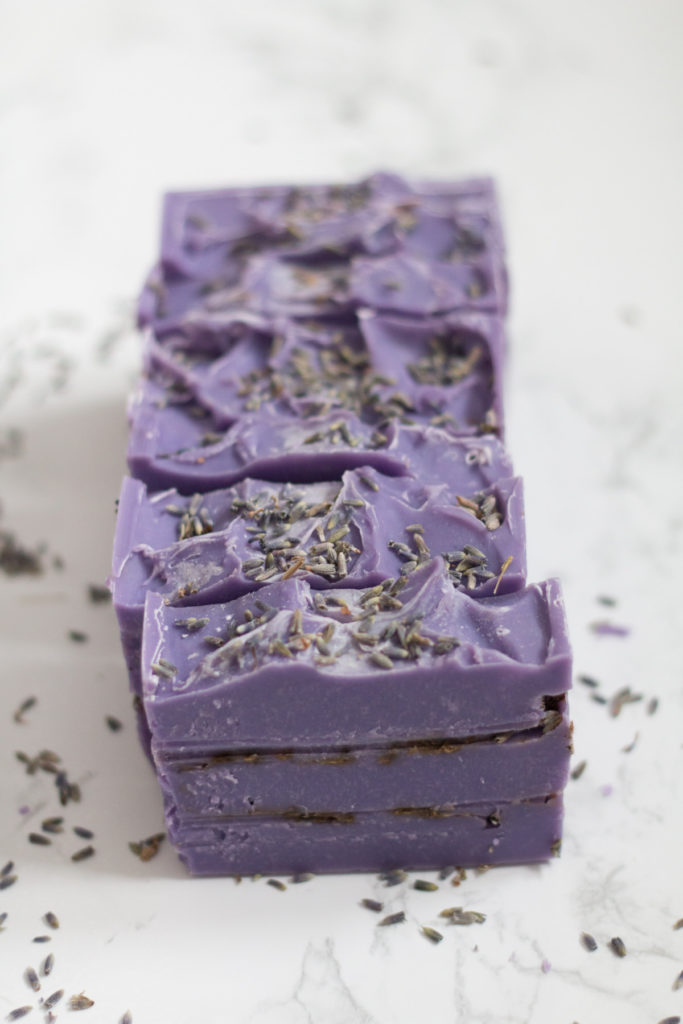
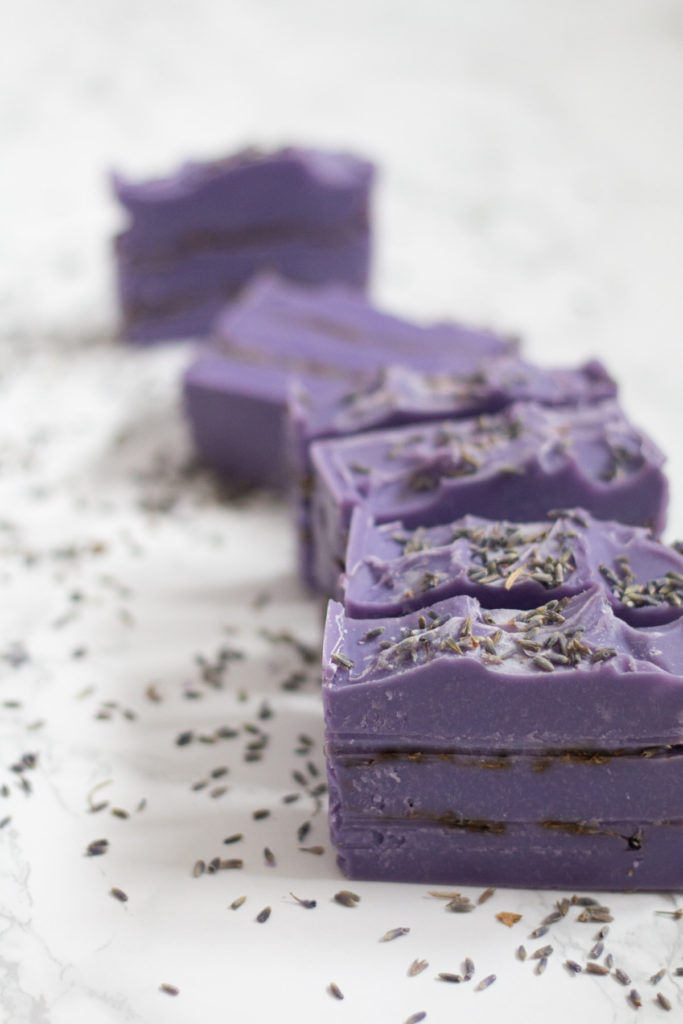
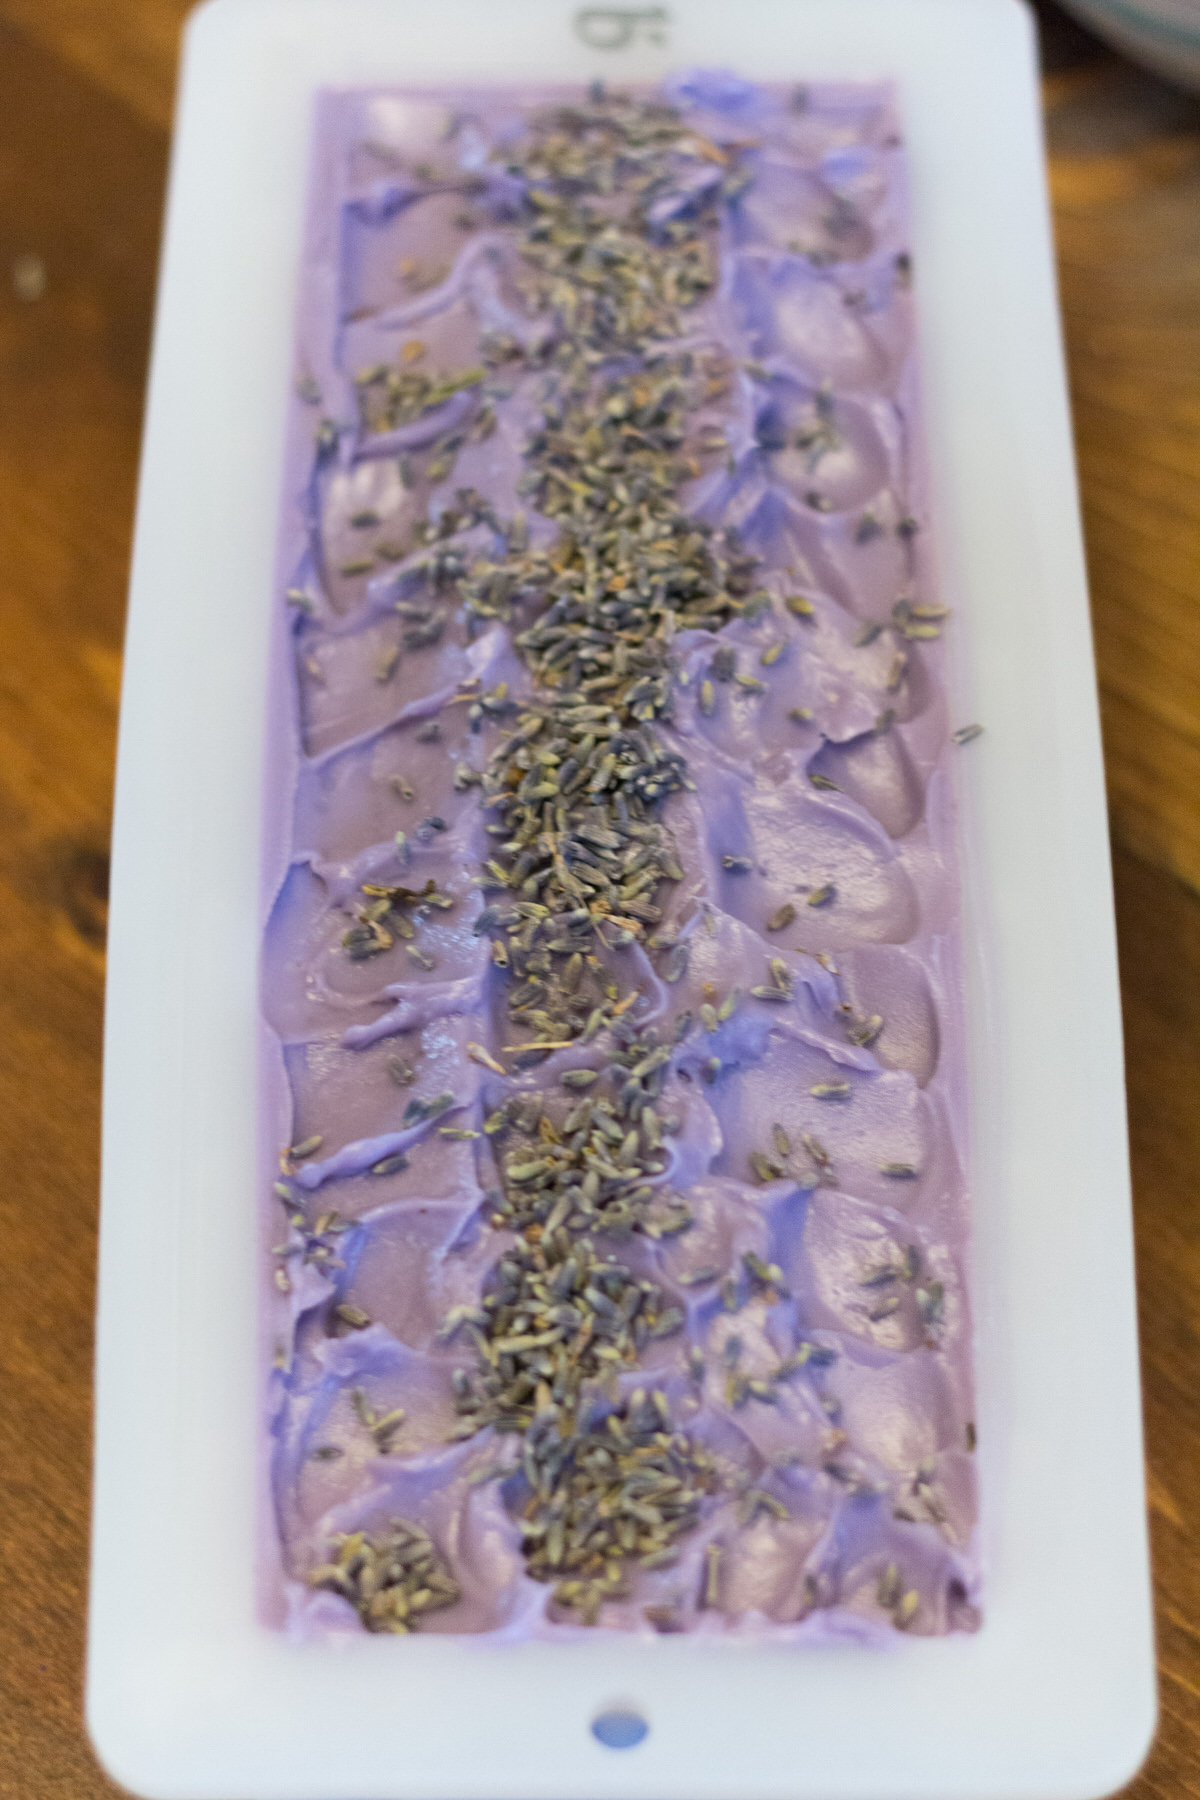
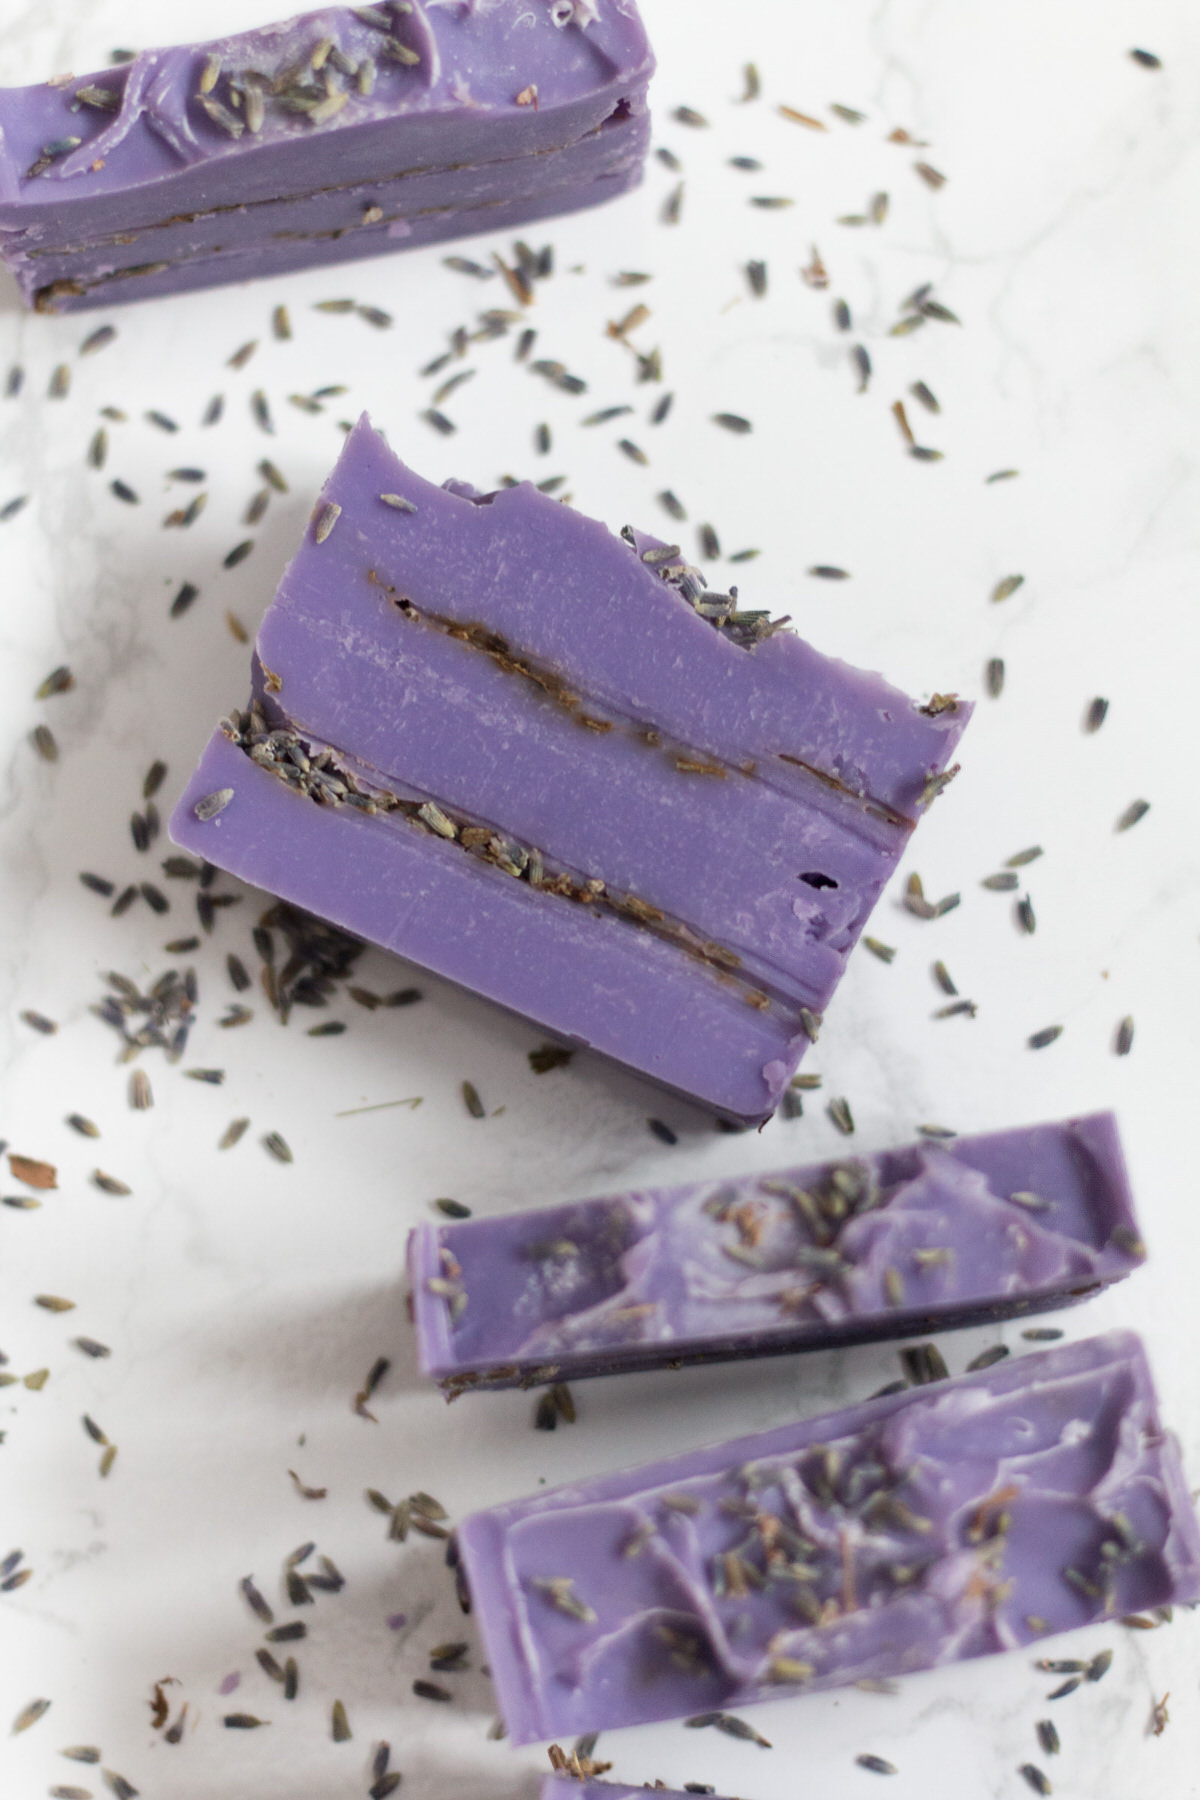
After 24 hours you can take it out of the mold and cut them to the size you want. I added lavender buds between layers and learned that cutting gets more complicated because of that but I was just excited that I didn’t care about the imperfections.

You let them air out and ‘cure’ for 4 weeks until use. It’s finally been 4 weeks and I used a bar in the shower and they smell amazing! Not surprised, they made our room smell so good the whole time they were curing.
The Natural Soap Kit for Beginners has three options: Refreshing Lemongrass, Energizing Orange, and Relaxing Lavender. I love how vibrant they are! My soap shapes aren’t that great but I had a blast trying something new that was somewhat challenging. No one is a professional from the very beginning, it takes a lot of time and practice to get good at something and I’m excited to keep using my mold and make some more soap!
*Not sponsored by Brambleberry, these are my own opinions! You can get the kit here.